Adding Custom Branding
As a partner, you can strengthen your presence on the Portal by adding your logo to the Portal banner. Your logo will appear in the top left of the Portal, next to the Megaport logo, for your account and your managed accounts. If you click your logo, you will be taken to your website. You can also add your logo to the emails that Megaport sends to your managed accounts.
For information about configuring custom branding using the API, see Customizing your Branding with the API.
Note
- Custom branding applies to your account and all managed accounts. You cannot enable it for individual managed accounts.
- Custom Portal and email branding both require a saved branding profile and can be enabled independently.
To add custom branding
- Log in as a Company Admin.
- Choose Partner Admin > Custom Branding.
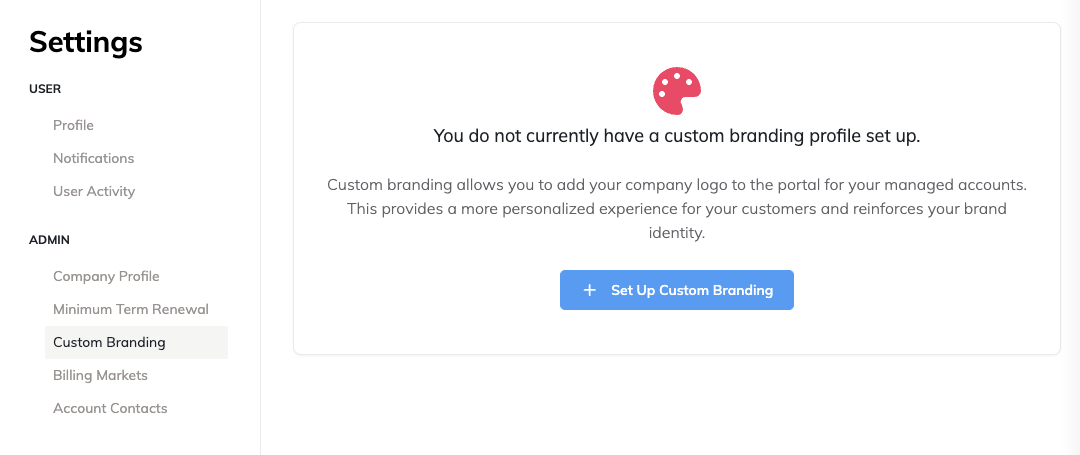
- Click Set Up Custom Branding.
The Custom Branding Settings page appears. -
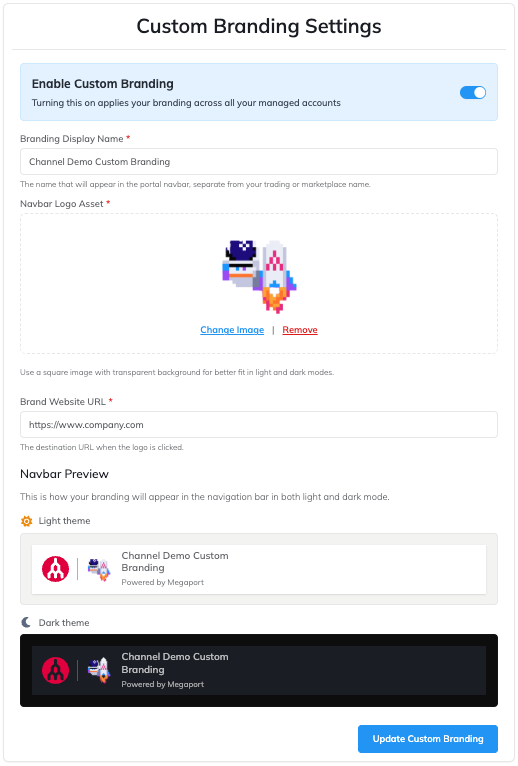
Add your branding details:
- Branding Display Name – Enter the name you want to display.
- Navbar Logo Asset – Upload the logo you want to display in the Portal banner.
This logo will appear in the top left of the Portal, next to the Megaport logo, for your account and your managed accounts. After you select a logo, you can resize it to fit the display area.
Images can be up to 2 MB and in one of the following formats: PNG, JPEG, SVG, or WebP. - Brand Website URL – Enter the URL of your website. This URL opens when users click your logo in the Portal banner.
After you add your branding details, the Navbar Preview shows how your branding will appear in the Portal banner.
-
Click Enable Custom Email Branding if you also want to show your logo alongside the Megaport logo in the emails that Megaport sends to your managed accounts.
-
Click Create Custom Branding to save your custom branding settings.
The Custom branding saved successfully message appears with these options:- Later – Return to the Custom Branding Settings page without enabling the branding. You can enable the branding later by clicking Enable Custom Portal Branding on the Custom Branding Settings page.
- Enable Now – Enable the branding and make it visible in the Portal banner for your account and your managed accounts.